Welcome back to All Star Signs‘ enlightening series on Vinyl Car Wraps. Today, we’re focusing on the installation process: transforming your vehicle with precision, an essential phase that brings your vehicle’s transformation to life. Follow along as we break it down into comprehensive yet concise steps.
Step-by-step Breakdown of the Car Wrap Installation Process
- Assessment: To begin with, the inspection of your vehicle identifies tricky areas and is the starting point of precision.
- Measurement and Design: Following, custom designs are created to fit your vehicle’s unique contours. Accurate measurements are key here.
- Print and Laminate: Furthermore, quality materials are printed and laminated. A good match ensures visual consistency.
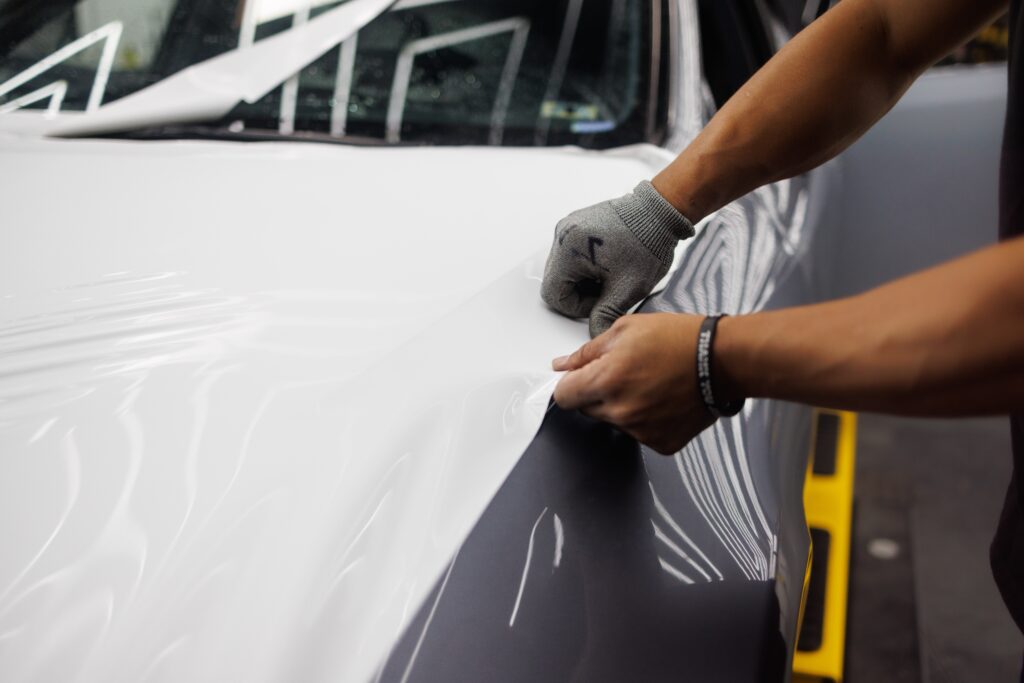
- Installation: Moreover, professionals carefully apply the wrap, smoothing out any bubbles. Experience truly counts here.
- Post-heat and Trim: Finally, post-heating secures the wrap, and trimming ensures a flawless finish.
In essence, this step-by-step approach makes sure the wrap looks stunning and lasts.
Surface Preparation and Cleaning Techniques for Optimal Adhesion
Before we proceed, it’s important to realize that surface preparation is paramount.
- Cleaning: Initially, all dirt, wax, and contaminants must be removed. Proper cleaning is vital for adhesion.
- Primer Application: After that, some areas might need a primer. Professionals know exactly where to apply it.
- Final Inspection: Lastly, a final once-over ensures that the surface is ready for the wrap.
All in all, these steps guarantee optimal adhesion and a perfect appearance.
Tools and Equipment Used During the Installation
The right tools make the process efficient. Here’s what professionals use:
- Squeegees: Specifically, for smoothing the vinyl wrap.
- Heat Guns or Propane Torches: Important for ensuring proper adhesion.
- Cutting Tools: Employed for trimming excess material.
- Gloves: Essentially, they keep oils and dirt from hands off the wrap.
The tools are simple but effective, ensuring a smooth and secure installation.
Common Challenges and How Professionals Overcome Them
Installing vinyl car wraps is no small feat. Here’s how professionals tackle challenges:
- Bubbles: With attention to detail, professionals use squeegees to smooth them out. Premium vinyl materials have an air release system built into the adhesive backing to remove any bubbles.
- Misalignment: Above all, patience, precision, and experience are essential to overcome this common issue.
- Weather Conditions: By comparison, controlled environments help in handling this. No shortcuts are allowed.
Each of these challenges is met with expert care and consideration.
Dos and Don’ts for Maintaining and Caring for Vinyl Car Wraps Post-Installation
After the installation, care must be taken to maintain the wrap’s appearance.
- Do: Generally, wash with care using gentle products.
- Don’t: On the other hand, avoid high-pressure washing; it can damage the wrap.
- Do: Without delay, remove stains; they might become permanent.
- Don’t: Conversely, don’t let it sit in the sun for too long; excessive heat can fade it.
With this in mind, proper maintenance ensures the longevity of your vehicle’s new look.
In conclusion, the installation of vinyl car wraps is an art that requires attention to detail, expertise, and care. Trusting professionals ensures a flawless and lasting transformation. Regular care keeps it looking fresh and new. All things considered perfection isn’t just in the details; it’s in the entire process.
Stay tuned for more insights in our series and, by all means, reach out to us at All Star Signs for any vinyl wrap needs. With this purpose in mind, we are here to assist you in transforming your vehicle with precision and style. Whether you are looking for a fresh look or a complete overhaul, we have the expertise to make it happen.